Friday, December 30, 2016

Been a while - AKA 2017 project list

It has been a while since our last post. Life has been crazy and with the holiday season nothing has been happening since everything is packed into my very messy craft room. 

Hopefully that will shift as the new year comes - and here are some of the things we have on the burner to make:
  • Belt Sheath for an Oyster Knife
  • Holsters for Cosplay Guns
  • Calligraphy (just to practice)
  • Hobbit Hole  (this has been on the list for 5 years now)

I also really want to stretch into some new things this year. I am hoping to do some pretty serious home improvement projects, especially in my kitchen and craft room. I want to learn to do woodworking and some basic construction - and actually get some of the outside curb appeal projects too.

We are planning to put some of the cosplay guns up for sale in 2017 - so if you might be interested in a special toy, just let us know :)

Tuesday, September 27, 2016

Return of the Fallout Obsession - Bandolier Edition

I love my husband. He is awesome. He knows I love him.  And...He is obsessed. Seriously. Fallout. All of his happiness is oriented around this. And since I don't currently have a few hundred to drop on this years' PipBoy, we had to do something.

From Etsy Shop LeatherCladLegends
That something is inspired by this. (left)

Found on Pinterest
He loves pouches and pockets and armor. He likes things to look raggedy and tattered and abused. He loves being snazzy.

The other inspiration is this (right)


We started with the thin leather again (this stuff is just a pleasure to work with) and made a bandolier base, 3 pouches, one large hip bag, and a rib belt as well.


He needed a pauldron though. Some nice shoulder armor to display the lovely asymmetry he so enjoys. So, went to work on that.


He wanted tattered. He wanted abused. He wanted to be a Wasteland Survivor.  He wanted this....


What you can't see is the tooling on his large hip bag - wanna know what it is? Oh yeah.... Brotherhood of Steel!


I think we did good - what do you think?

Thursday, September 22, 2016

Scribes' Kit and the finished steampunk belt

The hubby loves me. He does. I know it. He shows it. AND he makes me awesome toys to show it to other people too!

You may know that I enjoy throwing my hand to calligraphy every now and then. I have been doing it for more than 20 years now and have done a variety of different projects. I always have wanted to be able to sit down at Fair and do special things for people, but carrying all my inks, nibs, papers, etc has never been terribly exciting for me.

Now it is!

He saw this alchemists pouch on Pinterest/Etsy and we were truly inspired.

First, we cut it out of the
nice thin leather.

Then shaped it.

Then tooled it.

Then dyed it.

Then added all the fun bits!


It holds 6 ink colors, 6 different pen nibs, two quills, paper, my seal and wax and it is so pretty!


Look at how great it looks on my belt with the new steampunk costume! :D


I have a tea cup and saucer, a bottle of tea, the alchemist pouch for phones and other things, and the scribe kit snaps on and off in the back. 

Tuesday, July 19, 2016

Steampunk Belt - Stage 1; Belt and pouch

Step One) Lay out the hide
Last time we posted about the idea's and the goals of the steampunk scribe/apothecary belt. This post is construction and creation.

We started out with a LARGE thin hide. Measured the waist and added a few inches to make it overlap nicely.


Cut it out and dyed it, making a specialty dye of red and brown that resulted in a remarkably pretty treelike pattern.


Patterns are a good idea
And started designing the pouches for the scribe kit.
Step Two) Dye it

And the tea cup holders.
And the alchemist pouch too.

Then, we spent some time (and money) on amazon picking up different vials that will be for tea, sugar, ink and powders. We picked up a blowtorch to heat water for tea. We already had an awesome metal tea set (though there are concerns that it's double walls with limit ability to heat the tea in the cup and will force me to either use something else or remove the walls).

So is testing things
Step Three) World Domination?


Sadly, we ended up in a rush due to first weekend of Faire. I needed a belt and pouch so we had to produce something as soon as possible.  Due to the lack of time and more importantly, lack of rivets, we just did one pouch, the alchemist pouch.

Designed to fit nicely on my right hip, it is decorated with an alchemists beaker and closes with a crystal and wrap setting.

It fit in very well with my new orange/red/brown costume - and worked very well.

I am looking forward to the next steps where we polish up the closure, create the vial pockets, finish the scribe pouch, and work out any finicky bits.

Thursday, July 14, 2016

Tea Time Hatband

You may have noted there is a certain amount of impulsiveness that happens in my house? And that it is a spreading thing? Well, since the beloved hubby has been on a steampunk kick, I had to join in at least a bit.  Now, he is working on an absolutely AWESOME belt for me. It will have a tea cup, and a saucer, and a blowtorch, and a scribes kit for me.  I am so excited for it!

But...I needed something more to go with it. And I have this awesome new hat. I love my hat. See my awesome hat?

It is awesome isn't it?

I had even just gotten myself set up with an orange and brown and rust colored garb set for fair. And this beautiful set up would not be hard to convert into a steampunky dress and outfit without too much work. Especially since I am aiming for punk/madmax/renfair style instead of Victorian.

But the hat needed more! MORE!!!! and needed to not clash terribly with the red/orange/brown I was doing.

A friend of mine had a whole passel of unwanted fake brown leather hat bands. I had a need. I figured I could make something kludged together that would work...and I was right!

It started by putting one band flat and realizing that O'hell no way that was going to work. It was too thin, too wimpy all by itself. It needed friends. So...I sewed a second one to it. It was still a little 'eh', so a sewed a third on - and it was juuuuuuust right.


Add in a 4th band, some vials filled with tea, tea, tea and sugar - a handful of pop rivets (these things suck, why didn't I believe the people who told me so before) and I ended up with this! It's gorgeous! I set it up so the blue can also come off and be replaced with a gorgeous golden orange colored scarf...

Who thinks we are awesome? I do!

Tuesday, June 28, 2016

Shoes Part 2

I know - I am pretty lazy. So I didn't follow through with my plan to get flip flops and do the shoes that way they looked in the picture.

Instead, I trimmed down the shoe to actual foot size and sewed three straps on - created an ankle strap. Checked all the sizes as I sewed to make sure it would be tight enough (it actually needs trimmed a tiny bit on the right side still) and ended up with this!

They are comfy, lightweight and should help me on the days I don't wanna wear shoes at all! What do you think? Good/bad/keep working? 


Tuesday, June 21, 2016

Making Shoes

How to Make Sandals Guide
Many of you may know about my struggles with shoes... I have small feet that are very wide. This means commercial shoes give me two options; 1) Buy a size that is MUCH too long that I will slide around in, but that are wide enough or 2) buy the right length and hurt my feet on both sides. So, I tend to hate shoes. And really hate shoe shopping, because it always ends up being an expense that isn't worth it since no matter which way I go, it still won't be quite right (even wide shoes don't work).

So...I have been hunting pinterest for ideas. I like sandals, and they look like the easiest shoe to make, so I decided to give it a try.
I found this great instruction for some that looked pretty nice. But I don't own any flip flops and all the ones I have seen are the wrong size anyways.

So I traced my foot and made a loose draft, then cut it out of the last of the super hard leather. I had an old cotton shirt that had some holes, so I cut it up to make the straps and I starting trying.

Can you tell this was not a successful experiment? I need to cut them down a LOT, they are way too big. I need to sew the fabric into longer strips that connect instead of knotting everywhere. I need to add some kind of sole too.

I plan to pick up a dollar store or cheapie mens flop (that way it will be wide enough) and then cut it down to the right size. Then I will just glue my leather and fabric to it (once I do the resizing and the fabric fixing) and Voila! There shall be tolerable summer shoes!

Wish me luck?

Tuesday, June 14, 2016

Another Shield Project

Do you know what happened last summer when I was busy traveling?

PROJECTS!

So he had scrap wood. A silver sharpie. And an Idea :)

Here is the first stage - with the initial measurements still on the board.


Stage two shows what the wood he pieced together for the handle looks like

And we had two different wood stains. Here is just the dark (separated with blue painting tape).


 And then he added a cherry type stain over it all.
And put it all together. The whole in the back is what gives you room to actually grip the handle, and that is also where there is a front center piece, and the rear handle lift as well.


Then - the Finished Piece

That's me fully hiding behind it :)


Tuesday, June 7, 2016

Steampunk Sword

In the summer my long standing goth boy discovered brown (see the brown surcoat that he now wears everywhere), and steampunk became irresistible.

For our anniversary he wanted a sword. In September he picked up an anniversary sword at the local shop, Prince of Blades. He didn't find anything he LOVED, but got something anyways. You understand that there must be a new sword, right?

For spring he took apart a broken bike in our yard. He had gears. He had spraypaint. He had a sword he didn't love.

There was plottings.

And then there was cursing...

You see, he wanted to make a new handguard out of the gears, but 6 drill bits and more than a week of cursing and he still wasn't getting anywhere.


And then a Miracle! Rescued by the in-law with knowledge of drills and metal - and there was happiness.


Or at least, mostly a level of satisfaction. He remains unhappy that he couldn't do what he originally had in mind with everything - and is nitpicking at the results.

I think it's purty! How about you?

Wednesday, June 1, 2016

Steampunk Belt

Hip Belt on Etsy
We are getting ready for Ren Fair and continued Con attendance this year and I would like to have a nice steam punk (ish) costume as well as the rest of the family. I have some bits, but I am actually pretty seriously inclined to slack on this (I don't know why). But, the beloved is pushing me to make decisions and is working on making me the coolest belt ever!

I want to have an alchemist set up to make tea, and a good calligraphy carry case. We are using Pinterest (the most addictive of all sites) and looking up ideas.

Tea Cup Holster on Etsy

I want something that I can put vials of tea leaves, sugar, pen nibs and calligraphy ink in.

I need a carry case for the tea cup, saucer, spoon and strainer if I am using loose leaf tea.

Larp Scribe Kit on Etsy
I need a Scribe's case that will carry pens, quills, nibs, ink, paper and possibly accessories such as embossing power or wax and seals. I might add in some kind of magnifying glass (Secret of Kells style) for detail work.

I also need it to fit comfortably, have nothing hang too low, hold the tea cup so it doesn't break, and have extra pouches/bags for cell phone, money, cards and ID to be easily accessible. It needs to be a color that will look okay with all my other costumes - which since I cover the whole rainbow may be harder than it sounds.

A few years back I actually went black friday shopping - to Tandy's leather. Our local store is always so friendly and helpful and this was no change. I obtained a giant piece of super buttery soft thin leather. I was thinking I could make hats, or something else...but never touched in the last two years.

So, He pulled it out. He cut it up. He is making it happen! Soon!!!!!

Monday, May 16, 2016

Making a Light Gun


What happens when you leave two people alone in a house alot?

When they have access to a large number of light up gadgets and dollar store toys, an old nerf gun...and they have an idea?

In my house, it results in weeks of cursing and electrical work :) For the NCR Ranger Cosplay (See right for partial costume), Boyo really wanted a gun. But he knew from the internet and from friends that there are a LOT of rules that exist for what is acceptable in a convention. You can't typically bring anything that actually fires a projectile (so nerf went out the window) and it has to fit certain guidelines.  So what to do?

Once the evil feline overlord and project manager got out of his lap he could look at the supplies he had available. For the annual Parade of Lights we had picked up a pretty good selection of random LED lights. For Halloween we had picked up some LED sound sensitive glasses. For no reason I can remember we had an old Deer Hunter Video Game rifle (Did we ever own this game and I just don't know it?).

An idea was born. Or at least conceived. It took some time (a Month and a half of work, probably 30 hours of actually doing it) to become reality. Time, sweat, blood, tears...more cursing than tears, but still!

The decision was made to take the deer hunter gun and spraypaint it so it wouldn't be ugly orange. Than the decision was made to add lights to it. Then to add sound (this failed as the dollar store gun's obnoxious sound sensor fried under the fierce power of two AA batteries). Then to add vibration. Then more lights. Then switches. And toggles (I am exaggerating for effect here, but not much) and more lights!

It's been a LONG time since high school shop class, and that never really covered this type of wiring. Thankfully google and the internet are there for people who are going to try anyways.

In the end, it looked awesome and made a great final touch to his costume for Galaxy Fest. He keeps implying there will be more done to it - so we will see if this is the end of it all.


Wednesday, May 11, 2016

Cosplay 2 - NCR Ranger (Fallout)

From the boy...

So I promised this a while ago but never wrote it up for you. This summer Fallout 4 came out and of course rekindled my obsessive need for more and more in that universe, so much so that when we decided we were going to the local Galaxyfest convention I had to make a cosplay. Now I am not sure if you want to call myne or Monsters the first one I ever did. Hers of course you saw completed pictures of already. Of course I forget to take a lot of pictures of hers as it was being built, or even worn (my cell wont take pics anymore). But the process of building myne got a lot more camera time. Mostly because I was reminded to take pictures more often.

Lets start with the beginning, First of course I had to decide what I wanted to mimic, and what idea to roll out with. Wastelander? Wanderer? Vault boy? All seemed a bit small, a bit over done for me (and I don't sew so making a vault suit was out of the question). So what could I make? Or more importantly make similar to, but still shine ME through? The answer was of course the most used piece of armor for Cosplayers. The NCR Ranger Armor.

But I could not just copy paste it, I had to own it and make it myne. We tried to make just a base foam version of it, and we were going to find other ways to customize it and make it unique. Between the cat, lack of experience and over shooting my ability versus desires, it failed. So I had to start over.
Instead of mimicking the Armor most loved, I had to find a different route. So instead of making a carbon copy, I made a new idea.
Ranger Medic, the illusive 68 Whiskey Victor. For those of you playing the home game that means a Combat Medic that has passed Ranger training. From there the idea fell in line swiftly and the custom armor of a Ranger Medic 
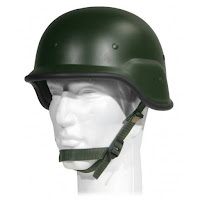
came to life. We had to start of course with the most iconic piece, The helmet. Again copy paste was an option, I saw every piece I needed to buy to put together and blend into a proper following, but I didn't love that. I needed a Medic to be unique. That means a new helmet. Besides what screams Medic better then the visage of death?


Not following me there? Its alright, I do not mind.
I came on the idea at random, clicking, looking, and shopping. Then fell in love with the concept swiftly. If a Ranger is the last thing you never see, then a Ranger Medic needed to be the last person you wanted to see. (Because lets face it, even special forces get in over there head.)
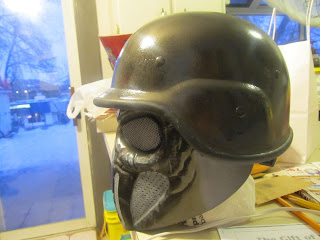
The skull mask I Acquired went well with a standard combat helmet, and made almost of a full covering. Sure it needed a head lamp and a radio antenna, but those came together eventually. (At some point I will give it a more iconic lighting unit then it has, but I like the 'aim-able' one.) Panting to blend Object A with Object B was necessary, but I have a great roommate that arts amazingly and roped him in.

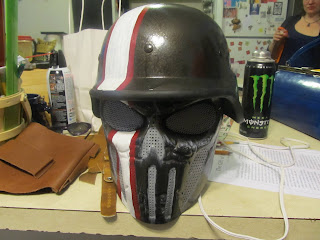
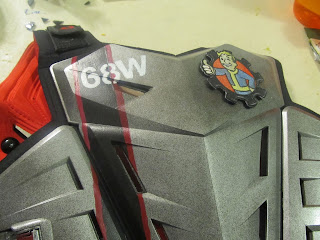
A mostly black helmet needed a touch of color and wear, so a "hammered" Spray paint was picked out and the two rapidly looked like one piece. A 
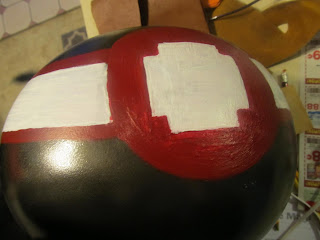
bit of accent paint (in the form of a racing stripe) was added to help blend the helmet to every other piece, but then the helmet needed more, a light grey was added to the cheeks, mouth, eye sockets, and nose of the skull to really make them pop out.

Next body armor. But wear to begin if foam failed me (or did I fail foam?).

 I needed to stay 
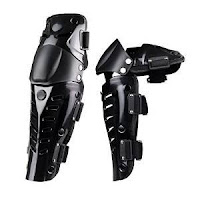
"scavenged" and that took work. Then like a mac truck it hit me, Motorcycle Armor! The shin guards are for off-roading, they cover shin, knee, and a small bit of thigh. They got a paint treatment to make them seem more like metal (and one got a racing strip in line with the helmet. (It bugged me that Rangers only wear chest and head armor)
The chest piece took me FOREVER to find, apparently if I were a child this would be easy, but adult size costs either your arms and legs, or doesn't exist. I did not need brand name, I did not need function, just form. A bit of stumbling let me find a piece of really cheap (read as not going to save my life) chest protection. SCORE! Order up wait for the man in brown shorts and DING!
Or not, it barely covered just my rib cage....... Creativity time. Since I needed to wear a jacket to stay similar to the real armor I realized my back didn't need anything as no one would see it. This means the removable back plate could get modified, and suddenly become gut armor! A bit of paint here and there, and they blended into a nice silver look of armor. The medics cross hides on the helmet, and on the right knee cup.

So far so good. 
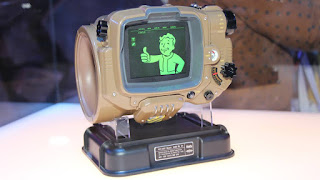
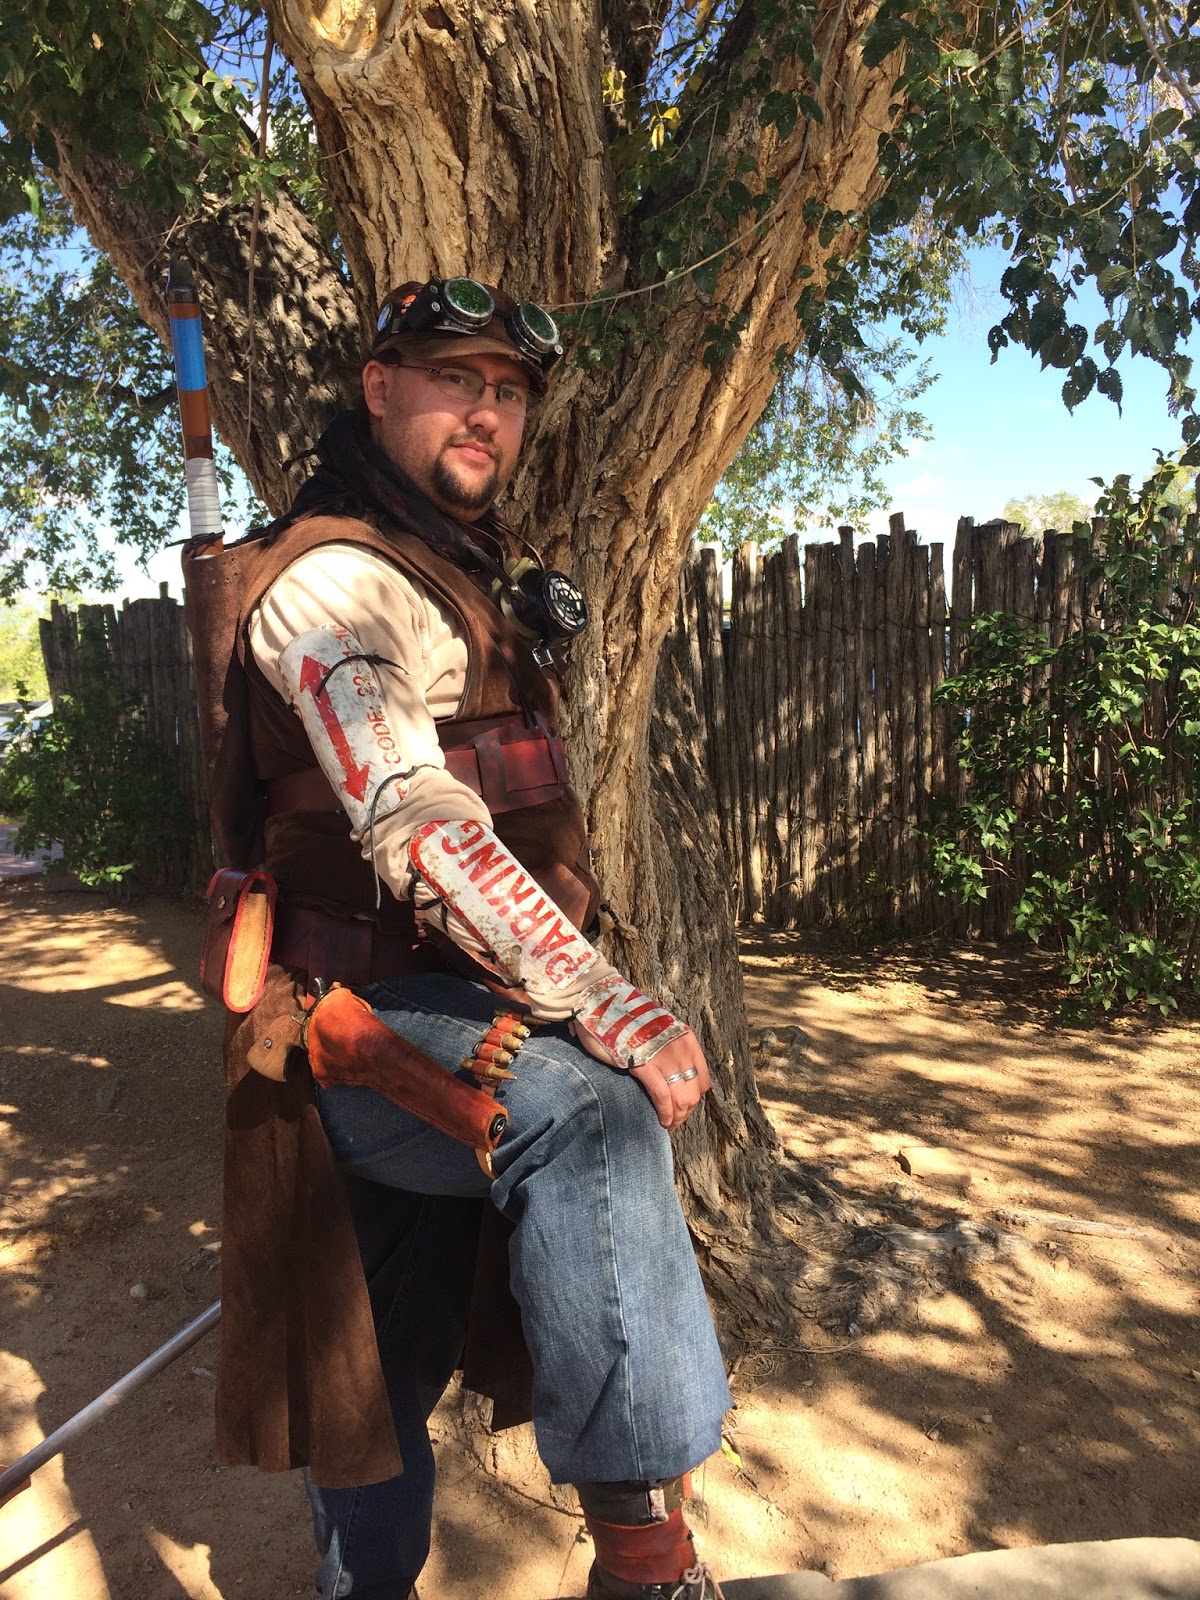
For the tie in (and to further make need of the expenditure of money) I added my Pip Boy. But what about my naked right arm? Insert a "No Parking sign I am still not certain how I got (the only known fact is I did not buy it). A hack saw, drill for holes, and elastic lace and BAM arm armor! The fact I beat it in to shape on an anvil without concern for the scratches helped age the sign better. Add on my leather surcoat from the Renfest, my archers gloves (because they are missing fingers, thumbs and are well worn) and I'm looking good! (Give me my moment)

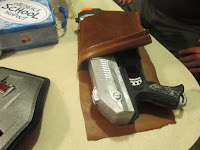
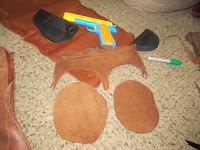
Just to overburden myself I added a scrap-made shoulder holster (with a blue and yellow 1911) my black canvas medics messenger bag, a gun belt with plenty of false ammo, a super sized Nerf pistol, plenty of pouches, a hidden balaclava, and then just to guarantee the heat stroke a brown and black scarf to wrap around my neck (its got little skulls and cross bones for its patterning).
But what should I carry as a main long arm?


This post now being super sized will be continued latter with the work to make my gun, for now enjoy pictures of the armor in its various stages of completion.......