First I spend about thirty minutes measuring the person in all sorts of weird places. I need to know Chest measurement, Waist, Hip and Belt. I need to know how wide from shoulder to shoulder on front and back (which yes, can be several inches different), how long from clavicle to belt, and then width from armpit to armpit and from armpit to belt. All of that information goes into my little blue leather work book, along with any details of your design.
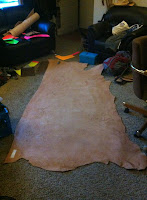
 From there I go out and buy supplies. That means a two hour trip to the leather store for leather, dye, buckles, straps, screws, and more. My most recent project took two different hides. Once home I lay everything out and sort it into when I will use each stage. The leather is laid down and I trace the patterns on the inside in red sharpie. Red sharpie because it stays fairly light and doesn't stick out as badly as black does. When I lose the red sharpie I use whatever comes to hand. This go round it was a neon pink sharpie.
 After tracing out the pattern, I pull out the giant clip-board and place it underneath the hide so I can begin cutting everything out. Someday I will have a workspace big enough to do this on it instead of the floor so it doesn't break my back to do...but that day is not today. After cutting out all the pieces I will take each piece and trim it, making sure all the cuts are solid and that nothing is messed up.
 Once the pieces are cut and trimmed I will begin tooling the leather - Either by soaking the piece in water to soften it or by spraying or wiping the piece down with water on front. Soaking makes the tooling easier, but makes the leather dangerously soft and occasionally creates strange dye absorption rates, so I am trying to reduce when I do that. Just doing a wipe or spray of water makes the tooling harder to do, so it murders my hands and slows me down significantly. I love when I get to create new designs and do individual artwork, it makes me happy.
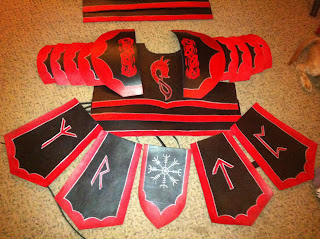
After tooling I will shape each piece and leave it to dry for at least 24 hours. Once they are dry I will dye them tooled area, reshape, and let dry again. Another 24 hours forward and I will do the main dye area's, reshape and let dry again. I will come back at least one more time, and normally two, to check the dye for light spots. I am working with a natural material, which means some spots take the dye better, some will barely take it, and some will change the colors on some dye's. After the dye is dry I add a protective gloss coat and rub off excess dye. It will still bleed (Bleed is the term for when you sweat or get wet and the color runs), I am working on trying to figure out how to reduce the bleeding more.
After each piece is tooled, shaped and dyed, I will put it all out on the floor and start marking the articulation points, and marking where each buckle and strap will be punched. Then I spend a day or two making all the holes necessary and tweaking each little section as I do so. I tend to use Chicago screws rather than rivets, so that I have a certain level of adjustability and the ability to take apart the pieces to clean them. I do use super-glue in some of the more steady locations to reduce screw-loose syndrome - but I do prefer to leave them unglued. Once the piece is put together in this way I need the body again to make it perfect.
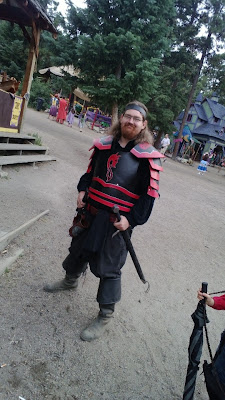
Ideally I will get the person to wear the armor for a day and give me feedback - This needs to be longer, shorter, tighter, looser - no matter how perfect the measurement is, you won't know how it fits someone until it is on them. Then I get to take it back home, make any additional changes and adjustments needed and then I get to deliver it into the proud new owners hands.
This most recent project was a ton of fun to do, but more work than I anticipated in the tooling department. I have learned another important lesson, I need to make Ray do all my business decisions like cost, timeframe, etc. If left to my own devices I will screw this up. So...Lessons learned and awesome armor made!
 |
| The Black and Red Viking Dragon Armor set was started Saturday June 8, and will be delivered complete on July 7th. |

No comments:
Post a Comment